*****************
Cut Two pieces of cardstock 6" x 6" (for the base)
*******************
Score the two pieces of cardstock at 3" from top to bottom
****************************
Cut a 4" circular die - mark 1" around each edge to create the center
********************
Fold one of the two
***********************************
Use tape to anchor with the two pieces together, turn over and repeat
**************************
Cut Four pieces of designer paper 6" x 6"
******************
Use a circle die slightly larger that cut the larger 4 pieces.
*************************
Trim the 4 pieces of backing papers
*************************
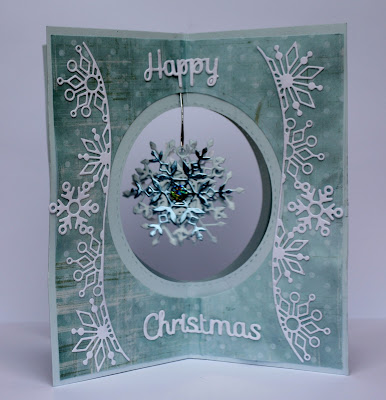
For this card I decided to add snowflakes for the spinner element,
Add one of the the piece of backing papers firmly taped to the spinner element.
***********************
Decorate between 'pages'
***********************
**************************
If you haven't got a double sided stamp or image cut a suitable circle (smaller than the image to use) and add or build up, on both images, which ever image to use. I used a small circle and added a snowflake on both side to the 'spinner' element, I have some Prima flowers that are too large as part of a card - they would be useful as the center!!
Any problems, queries or suggestions please Email me - rica369@gmail.com
Amy problem with the email address let me know - I've had a problem with it !!!


4 comments:
STUNNING Heather..and a fabulous easy to follow tutorial..
Luv CHRISSYxx
Oooo what a stunning tutorial and thank you so much for letting me know that you had done the tutorial too, Luv Sam x
Beautiful card, Heather, thanks for the tutorial too.
Hugs
Sue
Stunning crad, fab colour combo and great details. Hugs;moni
Post a Comment